


With a little ingenuity, you can make good use of “unusable” pencil stumps.
Happiness comes from small things! Prolong product life and reduce waste.
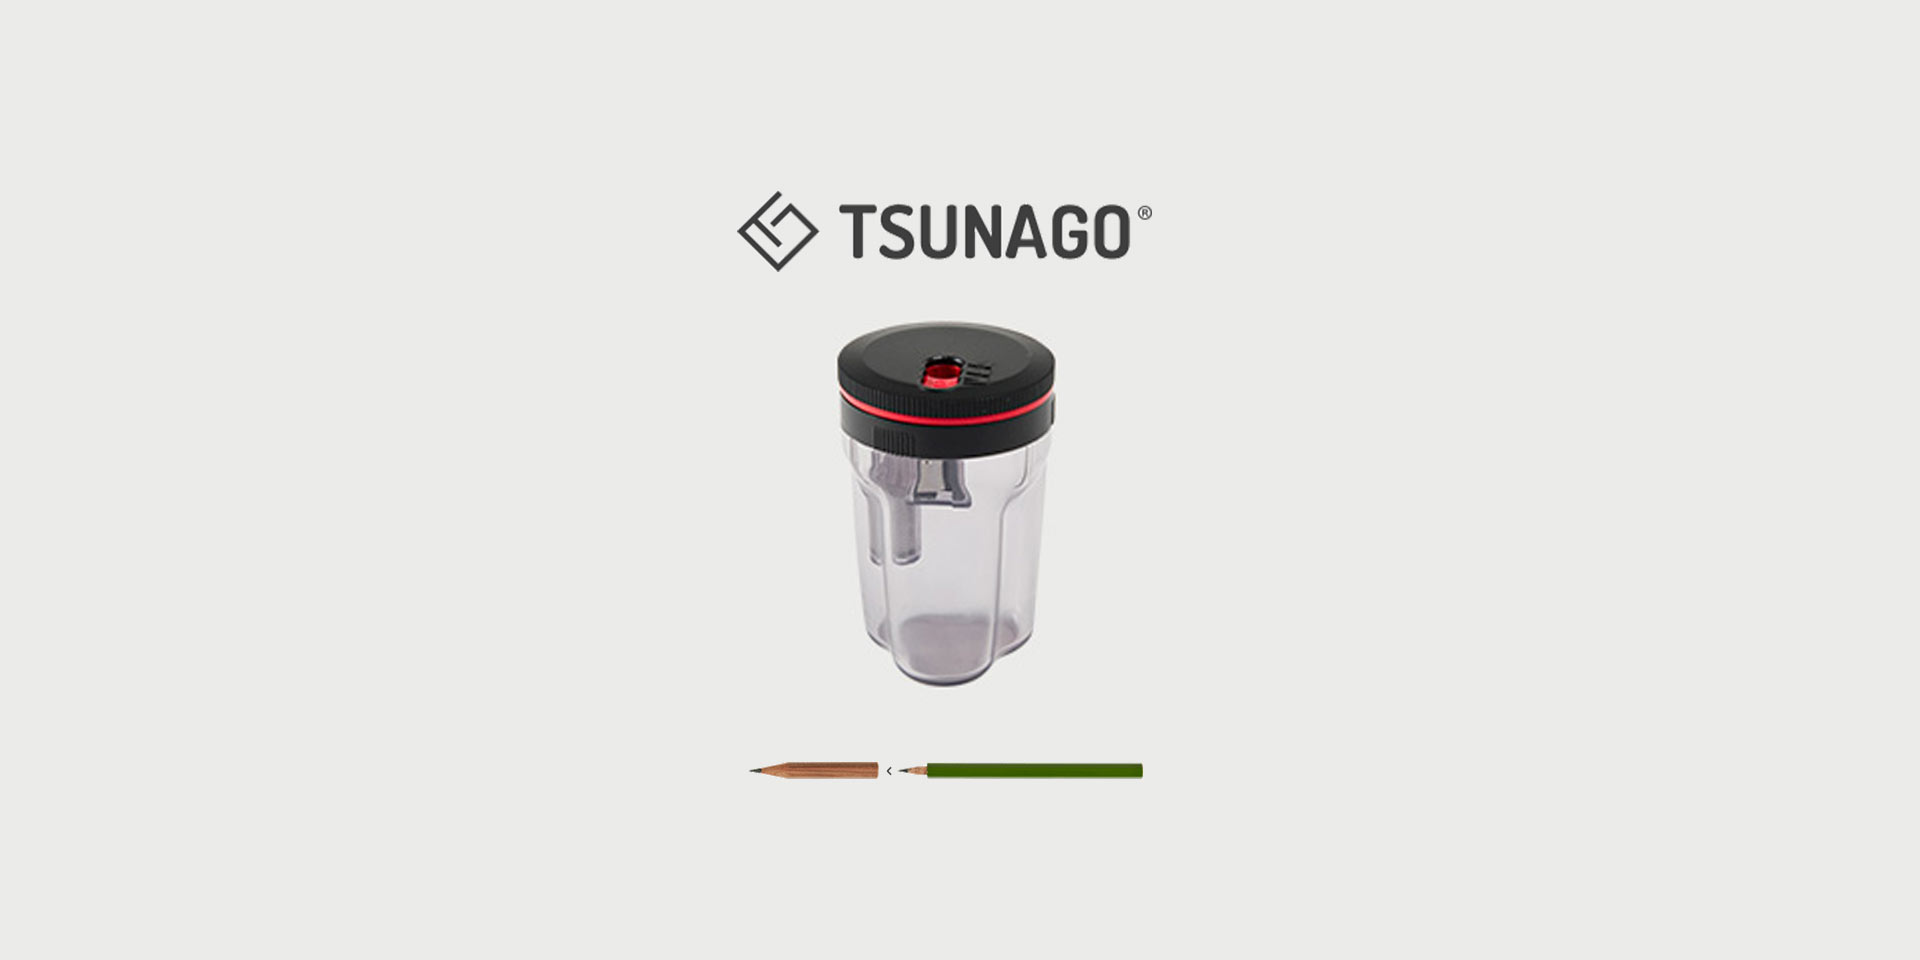
Let’s start with pencils. You will feel more connected to things around you.


We have been donating part of the profits generated through TSUNAGO to the sustainable future of productive forests.
Page transition
“This product can be considered as having designed the ‘action’ of reusing pencil stubs. We appreciate its detailed, comprehensive design, including usability. This is an excellent product not only in terms of its ‘hard’ function of sharpening pencils, but also in terms of its ‘soft’ aspect of fostering feelings toward avoiding waste.”
Good Design Award judge comments included the following

❶First open up a recess hole at the rear of the pencil. Turn the TSUNAGO cap to match it up with dial setting [1].
Insert the rear end of the pencil and rotate it clockwise.

1.Take care not to injure yourself with the point of the pencil when cutting out a recess hole in the rear of the pencil.
Excessive force may break the wooden part of the pencil.
(Use a woodwork adhesive for repairs if this breaks)

2.Check that the pencil is centered by lightly pressing the rear end of the pencil down on the cutter before cutting.
The hole cutting process may cause the hole cut to be slightly off center depending on the shape and size of the pencil in use.

3. Cut a recess hole out of the rear of the pencil until the tip of the pencil reaches the red line.

4. After opening up this recess, lightly tap the pencil to get rid of any residue left in the recess hole.

❷ Next, carve out a protrusion on the other pencil.
Turn the cap to match itup with dial setting [2]. Insert the pencil and carve it down. Finally, set the dial
to setting [3], insert the protruded part and clean up the cut out part.

5.If you find it difficult to carve out a protrusion with dial setting [2], smooth the protrusion out using dial setting [3]. You should be able to easily carve out a protrusion with dial setting [2] after smoothing.
Keep carving until a right angle is formed as shown in the image below.


6.After carving out a protrusion with setting [2], make sure to clean up the wood shavings with setting [3] before inserting into the recess hole while gently rotating. Not doing steps (4) and (6) may cause the wood to break when joining the two pieces together. Adjust the position as needed if the pencil inserted is a little off center from the recess hole.Be aware that the pencils cannot be joined properly when the depth of the recess hole is insufficient.

7.Make sure to use a woodwork adhesive to firmly fix joined pieces into position.
Quickly wipe off any excess adhesive on the sides and wait for it to dry. Once completely set, a regular pencil sharpener can be used on the joined pencil.
Please read before use.
・Children are to use this product in a safe manner under the guidance of a guardian or an adult. Store it out of the reach of small children.
・Avoid joining two long pencils as the resulting pencil will be too long to use. Keep the length of joined pencils to around 18 cm and under.
・This process is difficult to perform when the pencils are too small. Join pencils before they become too short if possible.
・TSUNAGO is mainly suited for use joining hexagonal and round pencils with a diameter of 7 mm to 8 mm.
・The core diameter must be less than 3 mm.
・This product cannot be used with pencils with metal, resin, rubber or other materials and paper-based pencils.
・This product comes with a shaving blade and a cutter. Take due care when handling.
・Do not dismantle this product under any circumstances.
・You may form blisters on your fingers when opening holes in numerous pencils at once.
・Take care not to injure yourself on the point of the pencil when opening a recess hole on a short, shaved pencil.
・Seal joined pencils with a woodwork adhesive.
・You will not be able to use a regular pencil sharpener on the joined pencil when it is not sealed into position.
・Please be aware that the price, use, design and size of this product may change without notice in order to improve this product.


We release for a new product ‘TSUNAGO PENCIL HOLDER’
You need to learn the knack to make good use of the boring function of TSUNAGO. It might be somewhat difficult for small children or those who have a weak grip to handle it well.
It might take time to make full use of TSUNAGO, but please enjoy this unique type of woodwork with this eco-friendly tool.
A. You may not be applying enough force when turning the pencil.
Children or people whose grip is not strong enough may find it difficult to drill a hole without help.Please use under adult supervision.
①Grip the pencil firmly and, applying enough force to push the pencil into Hole 1, turn it clockwise.
(Do not apply too much force, as doing so may hurt your fingers. To avoid hurting your fingers, see Q7.)
Pencils may split when you first try. Practice on a few longer pencils. Adjust the force you apply to
ascertain the appropriate level so you can make a hole without cracking the pencil.
②Remove shavings from the drill hole (Hole 1) through the ejection window as necessary. [Figure 1]
If the gap between the drilling tool and the pencil is filled with shavings, making a hole will be difficult.
You may need to take four steps or so to drill the hole. If you come to feel that the pencil is not being
drilled, pull the pencil out 5 mm or so, and remove shavings between the drill and pencil through the
ejection window. Turn the pencil counter-clockwise slightly so that the shavings are at the bottom, and
eject the shavings to the bottom cover through the ejection window.
[Figure 1]

③When you get the feel that you are drilling, hold your TSUNAGO with one hand and the pencil with
the other and, applying a little force, push the pencil into Hole 1 and twist them as though you are
wringing out a rag. [Figure 2]
[Figure 2]

The ability to drill a hole varies from person to person.
A.If there is a big difference in size between Hole 1 and the pencil, the hole you are drilling may move further from
the center of the pencil. If the size of the pencil fits Hole 1 perfectly, the hole will be drilled at the center of the pencil.
①Place your TSUNAGO on a desktop and insert the pencil into Hole 1. [Figure 3]
[Figure 3]

②Turn the pencil slightly to make sure that the pencil is in place (or at the center of Hole 1).If the pencil is not positioned correctly, re-insert it.
③When the pencil is positioned correctly, start drilling the hole.Checking that the pencil is still positioned correctly, gradually deepen the hole.
④Ensuring that the hole is still centered, adjust your grip on the pencil so that it is easier to hold when completing the hole.
A.Remove the clear-smoke bottom cover from your TSUNAGO sharpener and
remove the broken lead with a toothpick (see Q5). [Figure 4]
Never use a metal object such as the tip of a ballpoint pen or mechanical pencil. Such objects will damage the blade, making it unable to sharpen pencils. Also, never use your finger to remove a broken pencil lead. Doing so may cause injury.
[Figure 4]

A.The convex end has not been shaved appropriately. When shaving the convex end with Hole 2, a sliding sound may be heard at first. If so, apply a little force to push the pencil in when shaving the convex end. When the sliding sound stops, shave the pencil normally. Do not continue to apply force once the sound has stopped. If you continue to apply force, the pencil lead will be more easily broken. Stop shaving when a shaving appears at the shaving blade. There is no shaving stopper, so it is possible to shave the pencil further than necessary. Keep an eye on how much you have shaved when shaving your pencil.
[Figure 5]

To remove the top cover of your TSUNAGO, hold the top in one hand and theclear-smoke bottom cover in the other (Figure 6), and turn the top cover counter-clockwise.
[Figure 6]

A.The following pencils cannot be inserted into your TSUNAGO:
– Pencils with a lead diameter of 3 mm or more
– Pencils with soft leads, color pencils, and cosmetic pencils
– Pencils with erasers, resin, or metal fittings on the end
The TSUNAGO can be used on any round, triangular, square, or pentagonal-shaped pencil that can be inserted into your TSUNAGO with a maximum lead diameter of 3 mm.We have not tested all types of pencils. In addition to the above-mentioned pencil types, some other types of pencils may not work with your TSUNAGO.
A. A pencil extender will help. This will also serve to protect your fingers from the tip of the pencil lead. Alternatively, wind a rubber band or similar around the pencil. This will serve as a slip stopper or cushion. [Figure 7]
[Figure 7]

It is unavoidable for your hands to be blackened because the pencil leads are black. We recommend wearing household rubber gloves. [Figure 7]
[Figure 7]